Wednesday, December 12, 2012

White Christmas Painted Wood Sign

IMG_0329

I saw this idea from The House of Smiths last year and couldn't wait to try it! 


White Christmas Painted Board

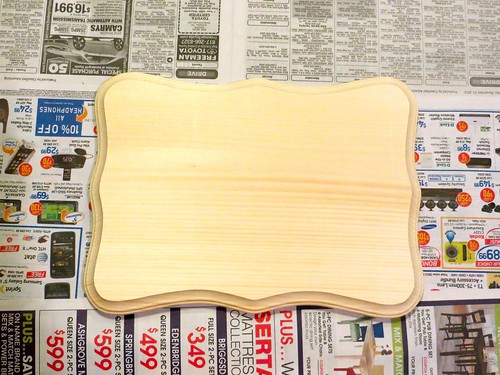
I started with a wood plaque from Hobby Lobby ($3).

Using push pins to keep wood off of newspaperUsing push pins to keep wood off of newspaper


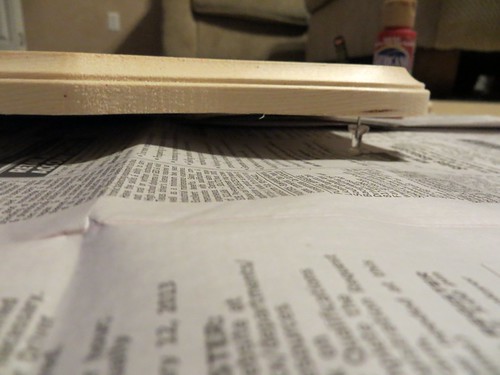
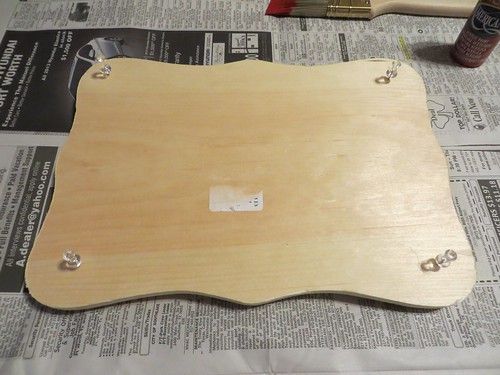
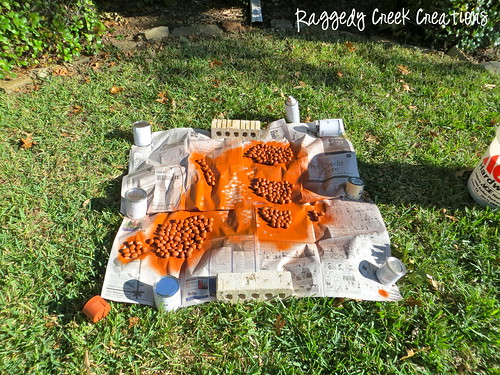
I then placed a push pin in each corner of the plaque to keep the paint from sticking to the newspaper.
I covered the entire plaque using "Santa Red" Americana Acrylic Paint (3-4 coats).
You can apply this paint with a foam brush but an actual paint brush (1 to 2 inch width) allows you
to get the sides a little easier.  Lastly, I cut my design out on white vinyl and
 placed it on the painted plaque after it dried.


IMG_0329

IMG_0323


shabby creek cottageIhookedupwithHoHlamespice


Saturday, December 8, 2012

My Christmas Card

IMG_0314

Here's my Christmas Card that I made and that I am sending out this year!  
I made 50 of these ...I'm surprised that I'm done so early!


Tuesday, December 4, 2012

Welcome Back Card


Here's a card that I made recently.  We had a co-worker come back to work after leaving us for a few months.  We designated him the Brett Favre of the pharmacy so I made a card to go with the theme! :)


IMG_0152s

Tuesday, November 20, 2012

Spray Painted Acorns

I decided to make use of all the acorns in my yard this year. 
It was a fairly quick project but I some how managed to drag it out over several weeks.


IMG_0201s

I took the acorns and popped the tops off of each one of them.
I then began spraying and turning them with each coat of paint until they were completely covered.

IMG_0202s

Here's the finished product after several sprays.

IMG_0203s

Rust-oleum had a beautiful fall orange color (cinnamon) that I just had to try!

IMG_0185s

Don't forget to save your tops!

UntitledUntitled


Pull out your glue gun and glue the tops back on the acrons.

IMG_0278

I had a lot of help.  Can't you tell?
Can a dog be jealous of acorns?  I think she was.


Untitled

Here's part of my final product.  Just in time for Thanksgiving! Whew!

Untitled

Here's where I put the rest of the acorns.


Saturday, November 17, 2012

Chocolate Chip Pancakes with Caramel Syrup


IMG_1412s

Chocolate Chip Pancakes
2 Cups Flour
1 tsp. Salt
4 tsp. Baking Powder
3 Tbsp White Sugar
2 Whole Eggs
1-½ Cups Warm Milk
⅓ Cup Butter, Melted
2 tsp. Vanilla
3/4 - 1 Cups Chocolate Chips

Preparation Instructions:
1. Preheat your waffle iron according to manufacturer’s instructions.
2. In a large bowl mix together the flour, salt, baking powder and sugar. Set aside.
3. In a separate bowl, beat the eggs. Stir in milk, butter and vanilla. Pour the wet ingredients into the dry mixture and beat until blended. Slowly add in the chocolate chips and mix.
4. Pour batter into the waffle iron, according to manufacturer’s instructions and cook until golden and crisp. Remove the cooked waffle from the waffle iron and continue with the rest of the batter.  Tip:  Continue to stir the batter as you go or else your last waffle will have a large amount of chocolate chips in it.  Although, several people may prefer it that way! 


IMG_1400s

Caramel Syrup
3/4 c. buttermilk
1 1/2 c. sugar
1 stick butter
1 tsp. baking soda
1 tsp. vanilla
Combine buttermilk, sugar, butter, corn syrup, and baking soda in a LARGE pot.  This syrup will boil all over your stove if you put it in a smaller saucepan.  Bring the ingredients to a boil and reduce heat to low (as long as it’s still bubbling, you’re okay). Cook, stirring very frequently, for 8-9 minutes. You’re basically making candy here and candy-making requires constant vigilance.
When it’s done, it should take on this luscious golden-brown color. Remove from heat and add vanilla.There will be foam on top. It tastes just as good, but it’s not super pretty. If you’re into aesthetics, you can skim it off; otherwise, just give it a good stir.

IMG_1397           IMG_1398

Monday, October 29, 2012

Paper Pumpkins

IMG_0138s

As soon as I saw this 3D Pumpkin design on the silhouette online store, I knew I had to give it a shot.

IMG_0122s
Here are the pieces that are included in this design.


IMG_0125s
First, glue the jagged edged rectangular piece into a cylinder.


IMG_0126s
Once the glue has dried flare out the ends of each side.


IMG_0134s

Then glue a strip onto each one of the tabs and repeat this again with the opposite side.

IMG_0136s
Lastly top the pumpkin with a stem, and you are done!

Tuesday, October 16, 2012

Fall Orange Burlap Wreath

Fall is here in Texas!  
Since we only have 2 or 3 weeks of fall in Texas, it's definitely something to celebrate!

IMG_0158

I saw this tutorial post from Whipperberry last year and just had to make this wreath in orange.  The love for orange I'm sure has something to do with my alma mater (University of Texas).  Hook Em! :) 

Fall Burlap WreathIMG_1440

Word of CAUTION:   Be careful where you make this wreath... by the time I was done, there was an orange film of burlap dust ALL OVER my living room!  I definitely have a new found respect for those poor ladies at the fabric store that have to cut burlap all day long! 

Fall Orange Burlap Wreath


Monday, October 1, 2012

The rainbow broke my camera!

The rainbow that broke my camera

I know that I have not posted much lately.  The biggest reason is that my camera broke.

We had a beautiful rainbow appear one evening and I just had to take some pictures.  When I went to edit my photos, I realized that there was a small blue line down the left side of all my pictures.  I tried to buff out the majority of the blue lines from those pictures but I don't want to keep doing that every time I take a picture.


IMG_1468
I at least got rid of the majority of the blue line in this picture.
 Even though it broke my camera, it is still a great reminder of God's Promises


 I've been relying solely on my iPhone, Instagram, and Pixlromatic app.  I've finally ordered a new camera (Cannon Powershot sx260 hs) and I'm hoping it will be here by next week!  I thought this might be my opportunity to branch out into the DSLR world.  But ultimately the ease of use and smaller size of the point and shoot camera won out.  It's just too easy to stick it into a backpack when were hiking or place it into the console on the boat  

So in the meantime while I'm waiting on the camera to come in, here's what we've been up to the last few weeks (fishing, hunting, and a trip to the Pecos River). 


 Untitled


Texas Pride