Here's a quick tutorial on how to use the trace function with the Silhouette Cameo.

First, copy or open an image into the studio. Then open the "Trace" function
and choose "Select Trace Area."

One you have selected your area, the studio chooses its default settings (see below).

You may need to tweak the settings so that the yellow area has clean lines.
I usually have to at least increase the "threshold."
For this particular project I had to increase the threshold to 49%
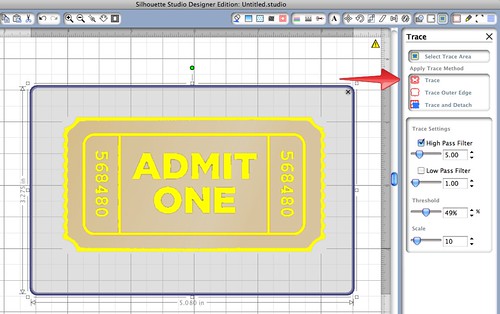
After you are satisfied with the lines, chose "Trace."

Here's the results.
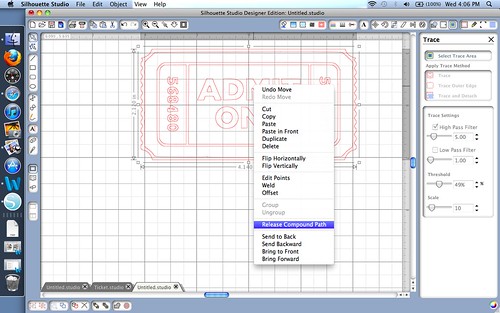
In order to make any changes, you will need to "Release Compound Path."
At this point I usually delete what sections that I do not want and add
color for printing.
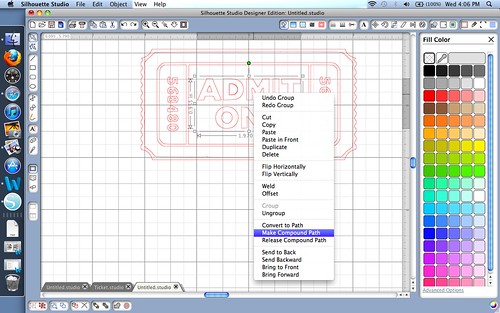
I wanted to print all of the letters and numbers in black.
So I highlighted them and made each section a compound path. I then filled them with black.
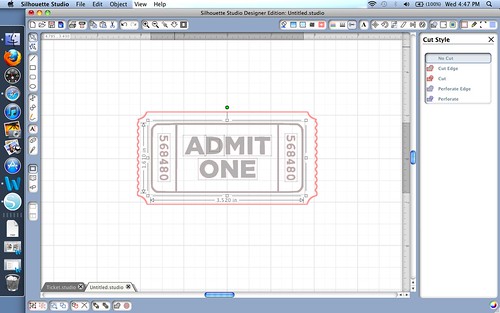
Don't forget to change the center areas to "No Cut."

And Viola!!

If you need to know how to print and cut after you have your
design good to go, click here for a tutorial.